Quick start guide
Overview
This guide will cover the following steps:
- Installing Docker
- Running the Carbon LDP™ platform
- Running the Carbon LDP™ workbench
- Developing against Carbon LDP™
- Keeping up-to-date
- Providing feedback
This guide will also cover subsequent steps, after the initial setup, such as starting and stoppinginstances, troubleshooting, and updating software when new versions are available.
Installing Docker
The Carbon LDP™ Platform and Workbench are packaged in Docker containers, which ensure the software will always run the same, regardless of its environment (Mac, Windows, or Linux). Docker allows you to spin up a Carbon Platform (server) and the Workbench (administrative GUI), with just a single command for each.
To get started, you will first need to install Docker on your computer. Download the binaries for Docker here:
https://www.docker.com/get-started
After installing Docker, execute the following command to validate that it was correctly installed and is running in your machine.
docker run hello-worldIf all went well, you should see a message similar to the following in your terminal.
Hello from Docker!
This message shows that your installation appears to be working correctly.
Running the Carbon LDP™ platform
Carbon runs as a server that listens for, and responds to RESTful HTTP requests for managing resources. It’s where all the data of your application will be stored and managed.
Now that you have Docker up and running, you can run the platform by following the steps below:
1. Create the platform’s home directory
In a folder on your machine, create a directory for the platform to store its data, e.g.: carbonldp/
Note that by default the platform is configured to be exposed through localhost:8083. This means that all the ids the platform will create are going to have that as a base.
To change that or other configuration parameters please see Platform configuration.
2. Run a platform instance
Run the following command to start your own platform instance for the first time. The command will fetch the image from a Docker repository and will run the instance.
Notes:
- Replace
/your/directory/path/carbonldpwith the absolute path to the directory you just created. Leave the portions after the colon near the path intact (:/opt/carbonldp/shared) - Complete the contact information (last three lines)
docker run -d --name carbonldp-platform -p 8083:8083 \
    -v /your/directory/path/carbonldp:/opt/carbonldp/shared \
    carbonldp/carbonldp-platform:5 \
        --carbonldp.contact.first-name="" \
        --carbonldp.contact.last-name="" \
        --carbonldp.contact.email="" \
        --carbonldp.contact.company=""
If you want to learn what each of these parameters indicate, you can read the following section:
Command explanation
docker run \                                                    # The 'run' command creates a container and starts it based on a docker image
    \                                                           # === Docker's run parameters
    -d \                                                        # Detached (meaning don't attach the instance's output to this command line)
    --name carbonldp-platform \                                 # The name of the docker container
    -p 8083:8083 \                                              # Expose port 8083
    -v /your/directory/path/carbonldp:/opt/carbonldp/shared \   # Map the local directory '/your/directory/path/carbonldp' to the container's '/opt/carbonldp/shared'
    carbonldp/carbonldp-platform:5 \                            # The docker image to use to create the container
        \                                                       # === Carbon LDP's configuration properties
        \                                                       # == Contact information
        --carbonldp.contact.first-name="" \                     # Your first name
        --carbonldp.contact.last-name=""                        # Your last name
        --carbonldp.contact.email="" \                          # Your email
        --carbonldp.contact.company=""                          # The name of your company
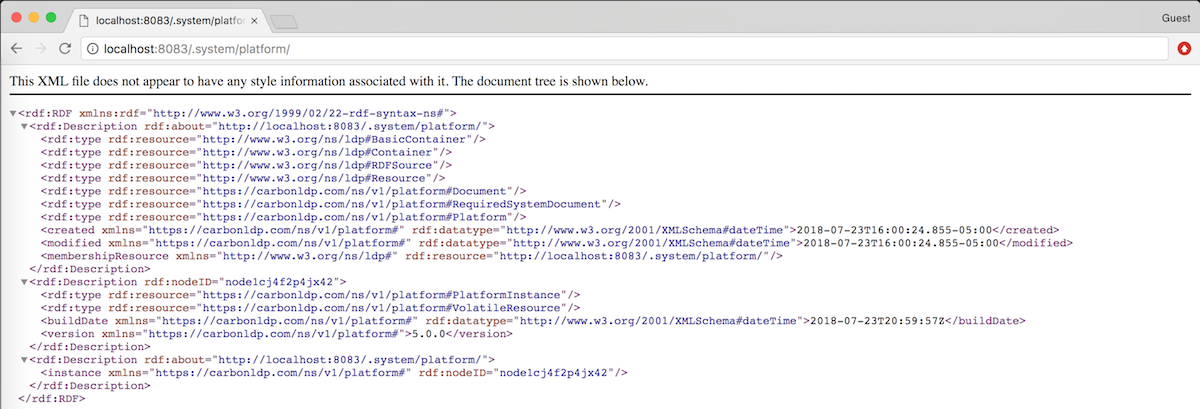
After executing the command, open localhost:8083/.system/platform/. If everything went well you should see a response in XML similar to the following:

Notes:
- What you’ll actually see in the browser may depend on the configuration you created and the browser you are using.
- It may take a while for the platform to start. Keep refreshing the page. If after 5 minutes, the XML response still doesn’t display, something went wrong.
- If you can’t load the page, check the URL. It MUST end with a slash /. All URLs handled by the platform will follow this rule.
Useful Docker commands
If you have problems running the instance, the following Docker commands may help you troubleshoot your situation.
docker ps --all– Will give you a list of all the containers you have and their statusdocker stop carbonldp-platform– Will stop the carbonldp-platform containerdocker start carbonldp-platform– Will start the carbonldp-platform containerdocker rm carbonldp-platform– Will remove the carbonldp-platform container (so you can recreate it, for example)docker logs carbonldp-platform– Will output the logs of the carbonldp-platform containerdocker logs -f carbonldp-platform– Will output the logs of the carbonldp-platform container and will continue to do so until stopped
Running the Carbon LDP™ workbench
The Carbon LDP™ workbench is a web app that helps you interact with the server through a graphical user interface (GUI). Among the features it provides are:
- Document Explorer – a GUI for visualizing and editing Carbon LDP documents
- SPARQL Client – a GUI for entering and executing SPARQL queries and SPARQL updates with results displayed in a friendly format
Using the Carbon LDP™ Workbench will aid your development process, especially in the beginning, because it allows you to visually explore the data you save with the JavaScript SDK or REST API. It also provides an easy way to query, inspect and modify data with a SPARQL Client.
To run the Carbon LDP™ Workbench, execute the following command (replacing the configured host, port, and protocol where appropriate).
docker run -d --name carbonldp-workbench -p 8000:80 \
        -e "CARBONLDP_HOST=localhost:8083" \
        -e "CARBONLDP_PROTOCOL=http" \
        carbonldp/carbonldp-workbench:5
If you want to learn what each of this parameters are indicating you can read the following section:
Command explanation
docker run \                                                    # The 'run' command creates a container and starts it based on a docker image
    -d \                                                        # Detached (meaning don't attach the instance's output to this command line)
    --name carbonldp-workbench \                                # The name of the docker container
    -p 8000:80 \                                                # Map container's port 80 to local port 8000
    -e "CARBONLDP_HOST=localhost:8083" \                        # Set env variable 'CARBONLDP_HOST' to 'localhost:8083'
    -e "CARBONLDP_PROTOCOL=http" \                              # Set env variable 'CARBONLDP_PROTOCOL' to 'http'
    carbonldp/carbonldp-workbench:5                             # The docker image to use to create the container
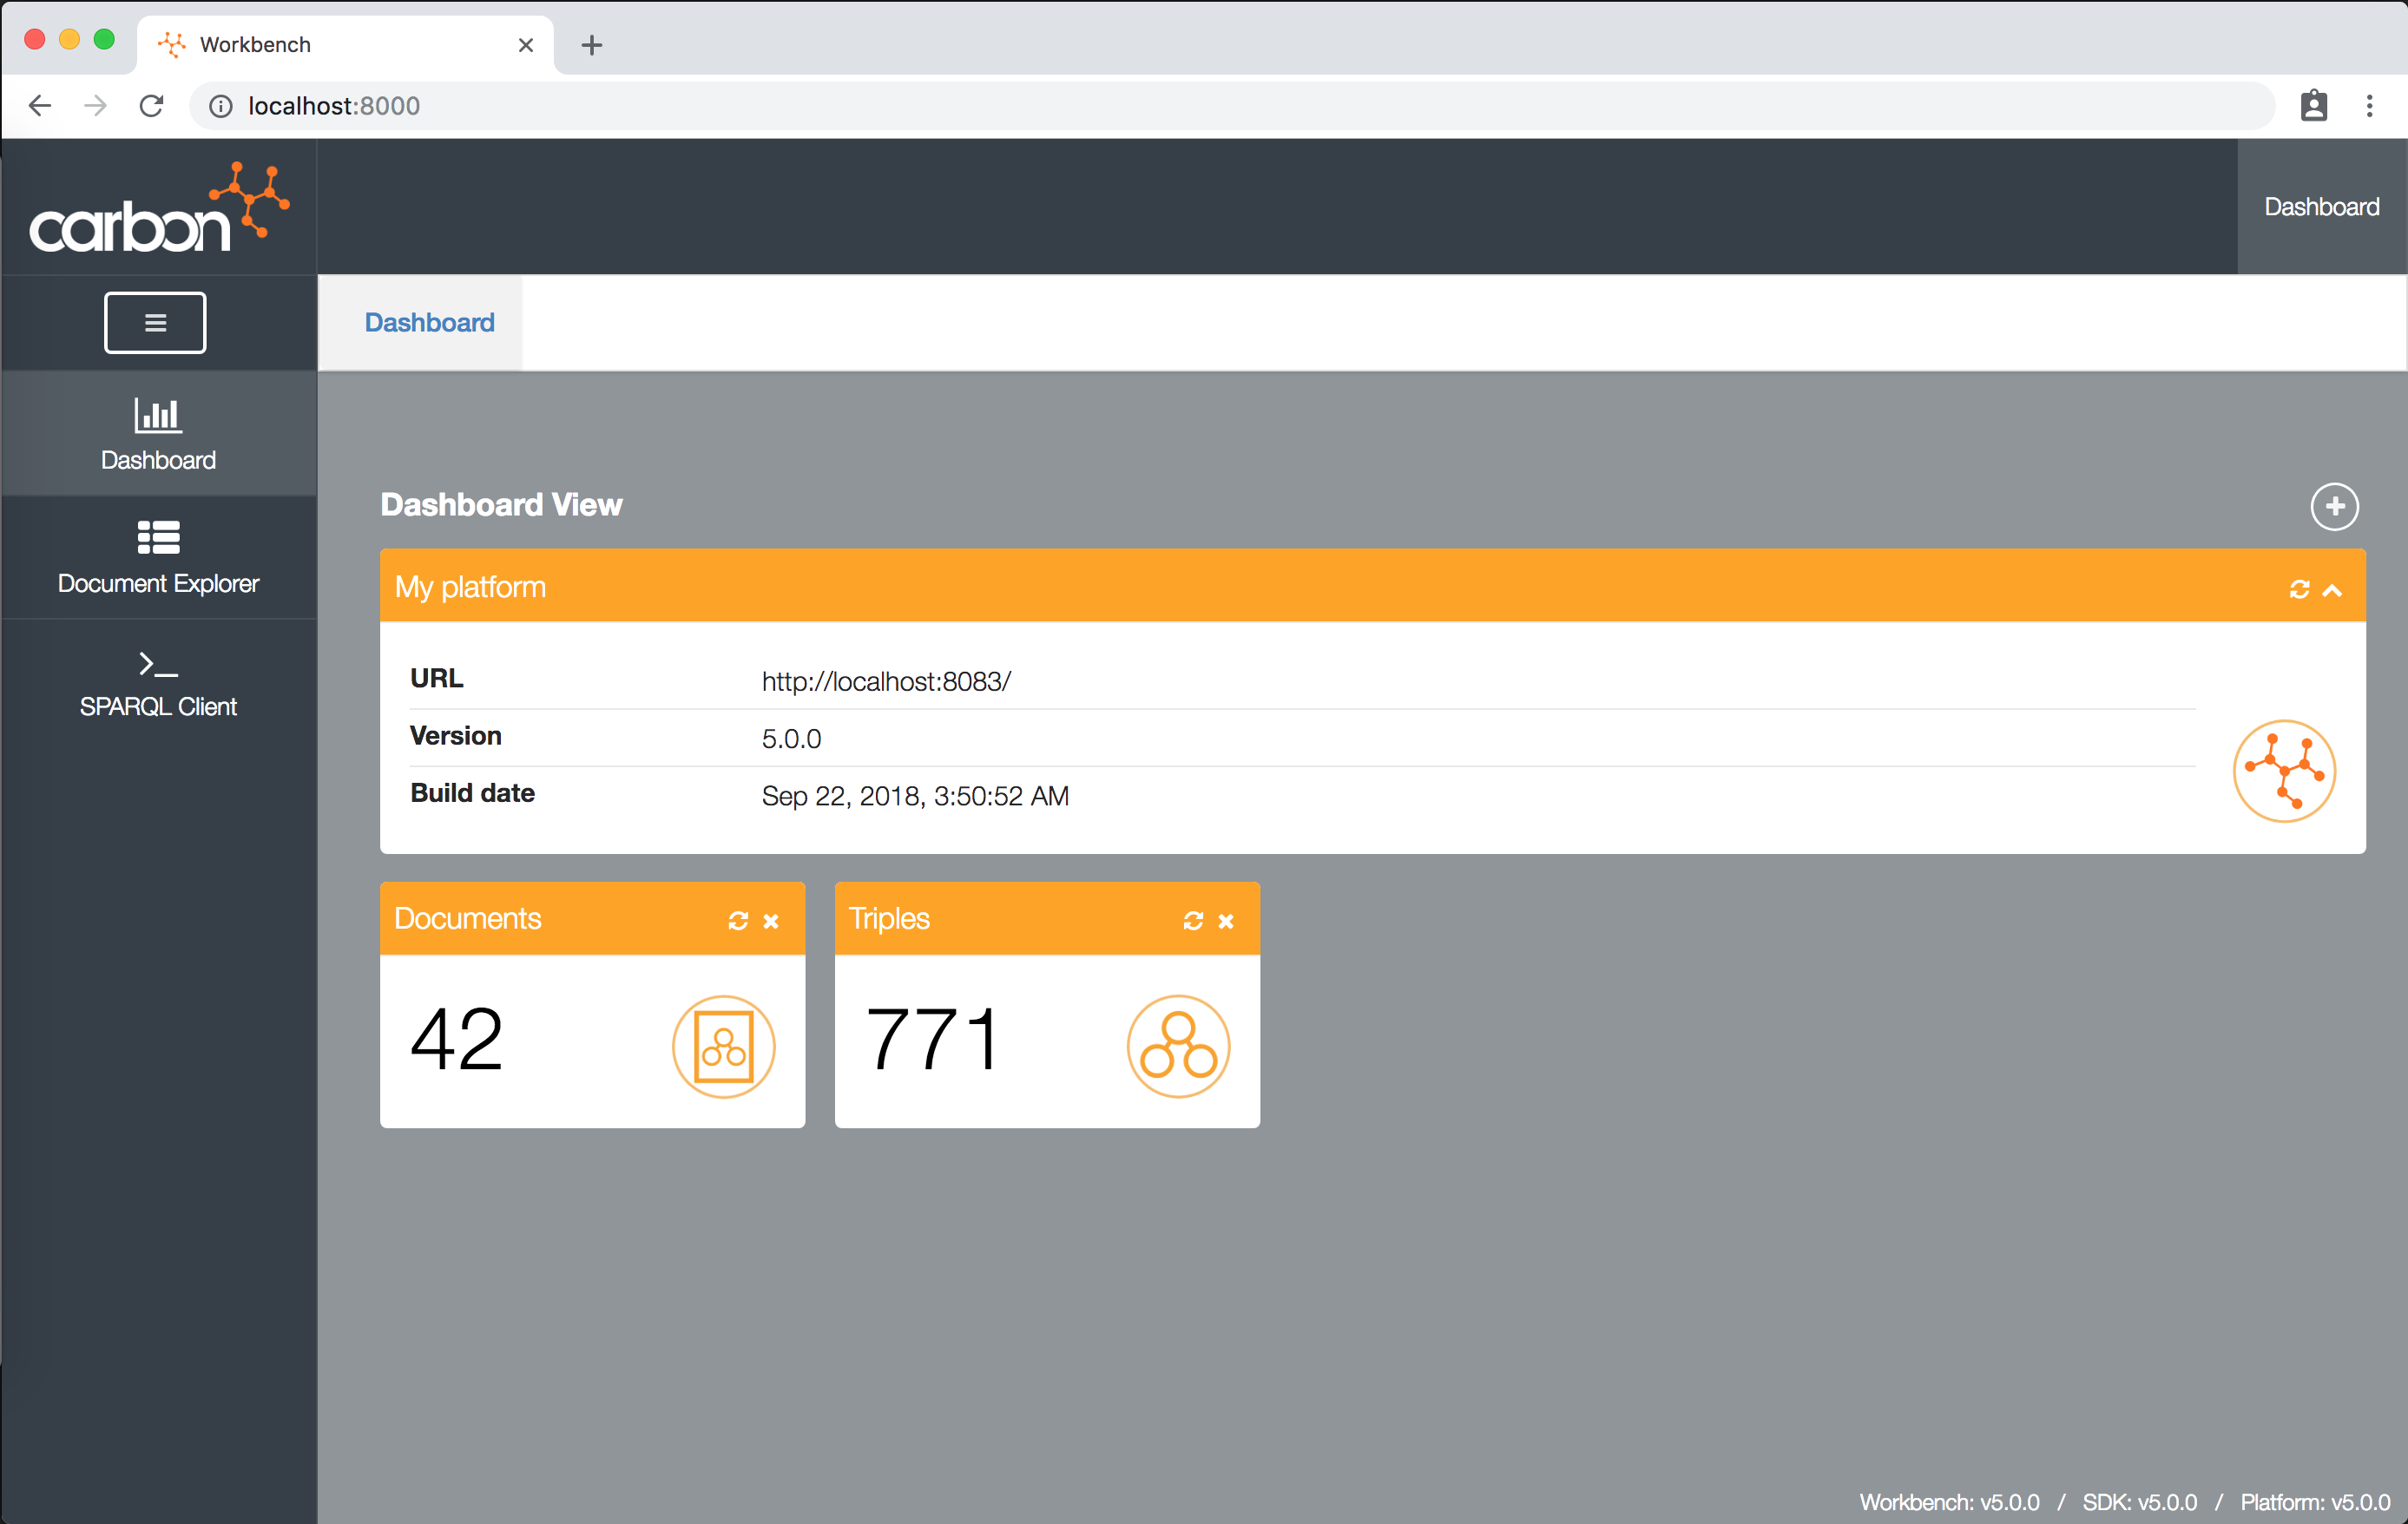
After executing the command, open localhost:8000 in your web browser. If the workbench is running, you should be presented with the dashboard page like this one:

In this page you’ll be able to view the specifics of your platform, such as its version, the number of documents stored on it and the number of triples the platform has stored so far.
Note: It may take a while for the workbench to start. Keep refreshing the page. If, after 5 minutes, the page still doesn’t load, something went wrong.
Developing against Carbon LDP™
Of course, the platform instance you just created is just the space in which Carbon LDP™ will store the data for the application you now need to build. The next step is to use the JavaScript SDK with your client-side code to build a client application.
REST API
Everything that the platform does is exposed through its REST API. This API is an implementation of the W3C LDP recommendation. Head over to the Getting Started with the REST API
JavaScript/TypeScript
To ease development against the REST API in a JavaScript/TypeScript environment we have created an SDK compatible with all the major web browsers and Node.js. Head over to Getting Started with the JavaScript SDK to learn how to use it.
You should also bookmark the Carbon LDP™ JavaScript SDK API Reference, which lists all the API objects and methods you can use.
Keeping up-to-date
Whenever we release a new version of the platform or the workbench, you should update your instances so you benefit from the new features and bug fixes. To be notified when new versions are available, please join our mailing list.
To update the platform and workbench you need to follow the steps below:
- Stop your running instances and delete them with the following commands:
docker stop carbonldp-platform && docker rm carbonldp-platformdocker stop carbonldp-workbench && docker rm carbonldp-workbench - Pull the remote newest images again by running the following commands:
docker pull carbonldp/carbonldp-platform:5docker pull carbonldp/carbonldp-workbench:5 - You should then create a data backup just in case something goes wrong with the new version.
To do that, copy and rename the carbonldp folder containing your config and data. - You can then spin your instances again with the same commands you used before:
docker run -d --name carbonldp-platform -p 8083:8083 \
    -v /your/directory/path/carbonldp:/opt/carbonldp/shared \
    carbonldp/carbonldp-platform:5 \
        --carbonldp.contact.first-name="" \
        --carbonldp.contact.last-name="" \
        --carbonldp.contact.email="" \
        --carbonldp.contact.company=""
docker run -d --name carbonldp-workbench -p 8000:80 \ -e "CARBONLDP_HOST=localhost:8083" \ -e "CARBONLDP_PROTOCOL=http" \ carbonldp/carbonldp-workbench:5
Providing feedback
Carbon LDP™ is a product in constant development. As such, we urge you to provide feedback as you evaluate the product so that we can improve it. Both positive and negative feedback are welcome; we love it all. In fact, we even give Valued Feedback Rewards to registered users who provide feedback (feature requests, identified defects, etc).
Please provide feedback by opening issues in Carbon LDP™’s general wiki and issue tracking project, carbonldp on GitHub.
To learn more about how we use GitHub to track project issues and feedback submitted by the user community, see: GitHub Conventions and Workflow for Carbon LDP.