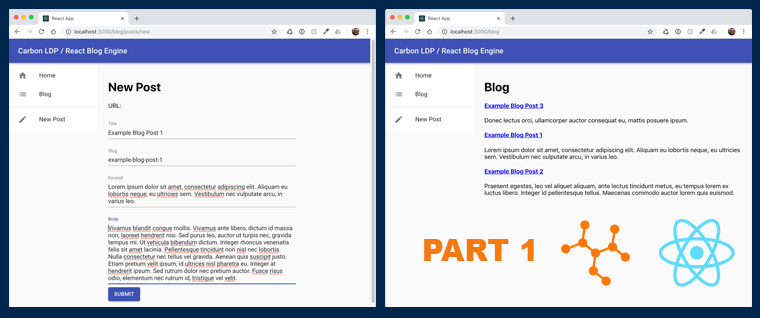
In this tutorial series we will demonstrate how to build a simple blog engine with Carbon LDP™ as our data layer and React components for the the user interface.
This tutorial is largely aimed at people who want to start exploring Carbon and React, who have some background in JavaScript and CSS, and who are comfortable with having nodejs/npm installed on their machines. You needn’t have any previous experience with Carbon or React; this will be a beginner’s level tutorial. We’ll also be using Create React App, which is a comfortable environment for learning React, and is a great way to start building a single-page application in React.
Complimentary source code for this tutorial can be found in the GitHub repo, carbonldp-react-blog.
In today’s tutorial (part 1), we will focus only on setting up the front-end with React, but before we get started, let’s take a moment to review the end goal – what we plan on building over the course of the series.
The end goal
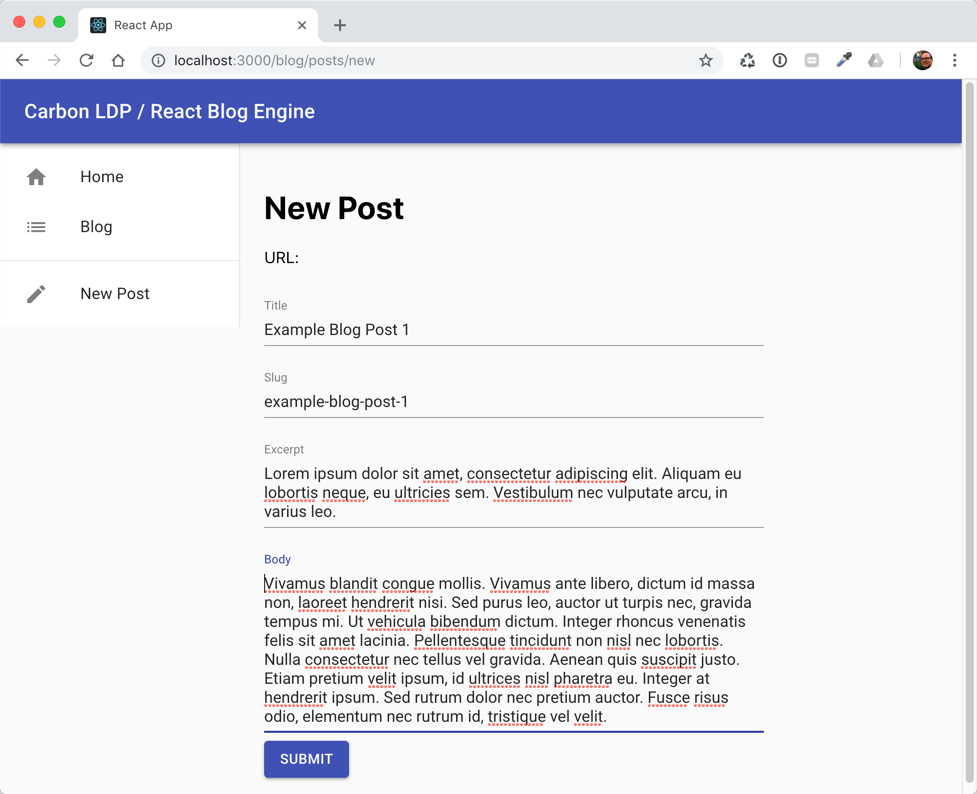
Since this is just a tutorial, our blog engine will not be as robust or feature rich as something like, say, WordPress, but it will be enough to teach you the basics of using React with Carbon LDP. Following is a preview of what we’ll be building.
The blog entry form
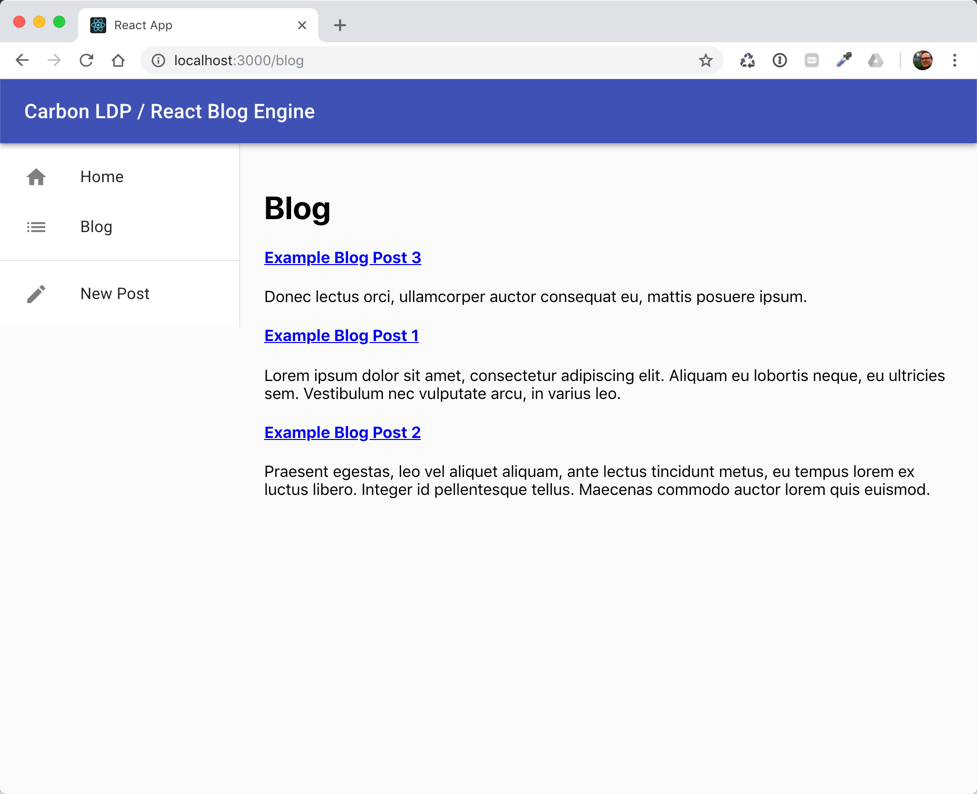
The blog post list view
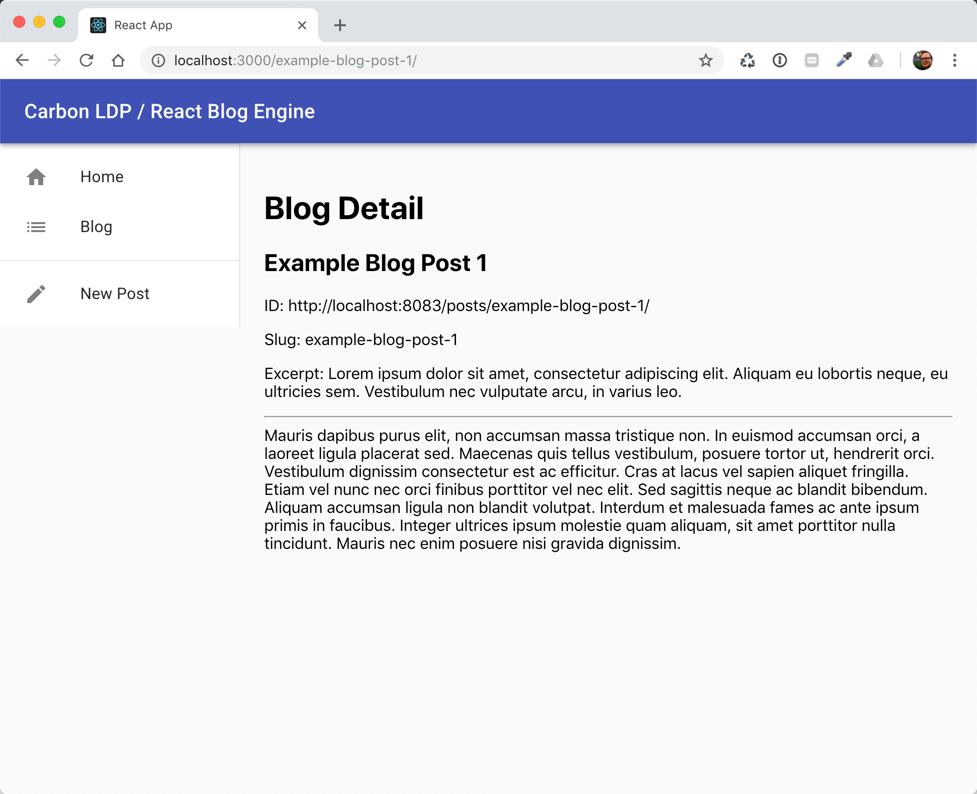
The blog post detail view
Beginning with the end in mind, our simple blog engine will include:
- A top-bar and a mobile-friendly menu drawer using React Material-UI components
- An empty home view (where some sort of landing page or dashboard could be implemented later)
- An editor view with a form for submitting new blog posts (no WYSIWYG; we’ll just keep it simple for demonstration purposes)
- A blog post list view that presents a list of recent blog posts, each linking to…
- A blog detail view for reading each post
When this three-part series is complete, you will have received a beginner’s introduction to both Carbon and React and you’ll have the foundation for a blog engine that you can extend and enhance. Perhaps you’ll make the world’s best new blog engine powered by Linked Data! Let’s begin.
Create the project skeleton using Create React App
Create React App sets up your development environment so that you can use the latest JavaScript features, provides a nice developer experience, and optimizes your app for production. You’ll need to have Node >= 8 and npm >= 5.2 on your machine.
To create the project, run:
npx create-react-app carbonldp-react-blog
cd carbonldp-react-blog
npm start
Note : npx on the first line is not a typo — it’s a package runner tool that comes with npm 5.2+. By using the npx command we’re able to execute create-react-app without the need to download and install it first.
This should open your browser to http://localhost:3000/ and display the following…
Create React App starting point
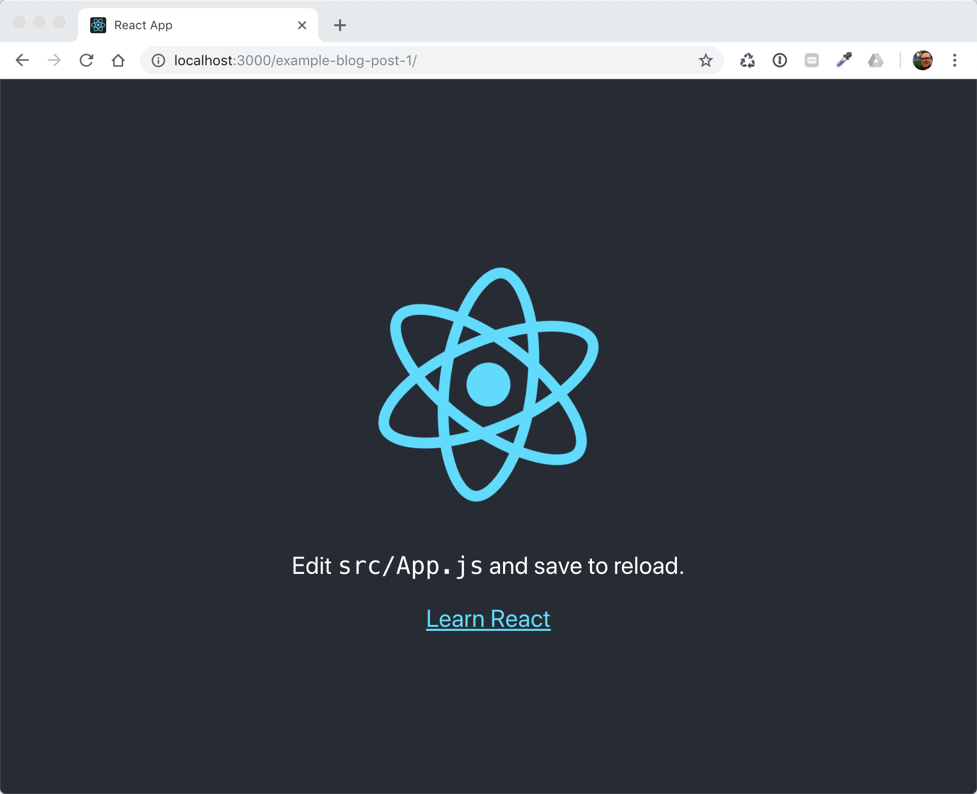
Create React App doesn’t handle backend logic or databases; it just creates a front-end build pipeline, so you can use it with any backend you want. Under the hood, it uses Babel and webpack, but you don’t need to know anything about them.
When you’re ready to deploy to production, running npm run build will create an optimized build of your app in the build folder. You can learn more about Create React App from its README and the User Guide.
Be sure to take a look at README.md in the newly created project. Create React App delivers one of the most comprehensive README file’s I’ve ever seen; it’s chock-full of good info!
If you look at the project at this point, you’ll see that Create React App created the following application structure…
carbonldp-react-blog
├── node_modules
├── public
│   ├── favicon.ico
│   ├── index.html
│   └── manifest.json
├── src
    ├── App.css
    ├── App.js
    ├── App.test.js
    ├── index.css
    ├── index.js
    ├── logo.svg
    └── serviceWorker.js
├── .gitignore
├── package-lock.json
├── package.json
└── README.md
public/index.html is the main HTML file that includes your React code and application and provides a context for React to render to. If you take a look at the source code for that file, you’ll find <div id="root"> in there; it’s the important part where your react application gets rendered in your browser.
The important directory for us as developers is the src/ directory where we will store all of our modifiable code.
index.js stores our main Render call from ReactDOM (more on that later). It imports our App.js component that we start off with and tells React where to render it (remember that div with an id of root?). index.css stores the base styling for our application.
App.js is a sample React component called “App” that we get for free when creating a new app. We’ll actually be deleting the entire contents of the file and starting over! App.css stores styling for that component specifically. Finally, logo.svg is just the React logo.
App.test.js is our first set of tests to run against our sample App component that we start off with.
Install Material UI
In order to focus on functionality, let’s leave most of the UI up to a proven set of components. We’ll use
Material-UI, which is a collection of React components that implement Google’s Material Design. We’ve chosen it for this tutorial series as it’s one of the most popular React component libraries available. To install it, run the following command:
npm install @material-ui/coreRoboto Font
The Roboto font will not be automatically loaded by Material-UI and this is the common font for use with Material UI. We can load it from a CDN or install it as part of our build pipeline. To keep things simple for now, we’ll just get it from CDN. Add the following line before the closing </head> tag in public/index.html:
<link rel="stylesheet" href="https://fonts.googleapis.com/css?family=Roboto:300,400,500">Font Icons
In order to use the font Icon component you must also add the Material icons font. Add the following line before the closing </head> tag in public/index.html:
<link rel="stylesheet" href="https://fonts.googleapis.com/icon?family=Material+Icons">SVG Icons
In order to use prebuilt SVG Material icons, such as those found in the component demos, we must install the @material-ui/icons package:
npm install @material-ui/iconsA minor thing
Also, in public/index.html swap out the existing meta viewport line for this one:
<meta name="viewport" content="minimum-scale=1, initial-scale=1, width=device-width, shrink-to-fit=no"/>Now, let’s just do a quick acid test. Modify src/App.js to be as follows.
import React, { Component } from 'react';
import Button from '@material-ui/core/Button';
import './App.css';

class App extends Component {
  render() {
    return (
      <Button variant="contained" color="primary">
      Hello World
      </Button>
    );
  }
}

export default App;
We’ve used the Button component from Material-UI, so the rendered result should now look like this when you run the app using npm start:

Note that you can now delete src/logo.svg since we’re not using it anymore.
Modify src/index.js to be as follows:
import React from 'react';
import ReactDOM from 'react-dom';
import './index.css';
import App from './App';
import * as serviceWorker from './serviceWorker';
import { MuiThemeProvider, createMuiTheme} from '@material-ui/core'

const theme = createMuiTheme({
    typography: {
        useNextVariants: true,
    },
});

ReactDOM.render(
    <MuiThemeProvider theme={theme}>
        <App />
    </MuiThemeProvider>,
    document.getElementById('root'));

// If you want your app to work offline and load faster, you can change
// unregister() to register() below. Note this comes with some pitfalls.
// Learn more about service workers: http://bit.ly/CRA-PWA
serviceWorker.unregister();
That just sets up the app to take advantage of the Material-UI theming system. We will not be doing much theme work in this tutorial, but it will prepare your app for such work in the future. Also, if we do not specify useNextVariants: true, in the theme object, as we’ve done above, we may get a pesky warning in the console related to deprecated typography variants.
Throughout this tutorial series, we’ll be committing at stable checkpoints, which you can find in the Git history for this project’s repo. At this point, we’ll commit with the following message:
Commit: Add Material-UI
Implement responsive drawer
I love the responsive drawer component because it provides a way to have navigation that works well on both desktop and mobile. In this section, we’ll swipe code from the Material-UI responsive drawer demo and tailor it for our own needs. We’ll start by creating a new custom component called Layout.
Create a new directory, src/components and within that, a directory called layout/ (i.e. src/components/layout).
In the layout/ directory, create an empty index.js file.
Now we’re going to paste a bunch of code and we’re not going to pause to go over everything that’s going on with that code. It is just a slightly modified version of the demo code given for the responsive drawer. Don’t worry about understanding how it works for now.
Paste the following code into src/layout/index.js:
import React, { Fragment } from 'react';
import PropTypes from 'prop-types';
import { withStyles } from '@material-ui/core/styles';
import {
    AppBar, CssBaseline, Divider, Drawer, Hidden, IconButton, List, ListItem, ListItemIcon, ListItemText, Toolbar, Typography
} from '@material-ui/core';

import MenuIcon from '@material-ui/icons/Menu';
import HomeIcon from '@material-ui/icons/Home';
import ListIcon from '@material-ui/icons/List';

const drawerWidth = 240;

const styles = theme => ({
    root: {
        flexGrow: 1,
        zIndex: 1,
        overflow: 'hidden',
        position: 'relative',
        display: 'flex',
        width: '100%',
    },
    appBar: {
        zIndex: theme.zIndex.drawer + 1,
    },
    navIconHide: {
        [theme.breakpoints.up('md')]: {
            display: 'none',
        },
    },
    toolbar: theme.mixins.toolbar,
    drawerPaper: {
        width: drawerWidth,
        [theme.breakpoints.up('md')]: {
            position: 'relative',
        },
    },
    content: {
        flexGrow: 1,
        backgroundColor: theme.palette.background.default,
        padding: theme.spacing.unit * 3,
    },
});

class Layout extends React.Component {
    state = {
        mobileOpen: false,
    };

    handleDrawerToggle = () => {
        this.setState(state => ({ mobileOpen: !state.mobileOpen }));
    };

    render() {
        const { children, classes, theme } = this.props;

        const drawer = (
            <div>
                <div className={classes.toolbar} />
                <Divider />
                <List component="nav">
                    <ListItem button>
                        <ListItemIcon>
                            <HomeIcon />
                        </ListItemIcon>
                        <ListItemText primary="Home" />
                    </ListItem>
                    <ListItem button>
                        <ListItemIcon>
                            <ListIcon />
                        </ListItemIcon>
                        <ListItemText primary="Blog" />
                    </ListItem>
                </List>
            </div>
        );

        return (
            <Fragment>
                <CssBaseline/>
                <div className={classes.root}>
                    <AppBar className={classes.appBar} position="absolute">
                        <Toolbar>
                            <IconButton
                                color="inherit"
                                aria-label="Open drawer"
                                onClick={this.handleDrawerToggle}
                                className={classes.navIconHide}
                            >
                                <MenuIcon />
                            </IconButton>
                            <Typography variant="h6" color="inherit" noWrap>
                                Carbon LDP / React Blog Engine
            </Typography>
                        </Toolbar>
                    </AppBar>
                    <Hidden mdUp>
                        <Drawer
                            variant="temporary"
                            anchor={theme.direction === 'rtl' ? 'right' : 'left'}
                            open={this.state.mobileOpen}
                            onClose={this.handleDrawerToggle}
                            classes={{
                                paper: classes.drawerPaper,
                            }}
                            ModalProps={{
                                keepMounted: true, // Better open performance on mobile.
                            }}
                        >
                            {drawer}
                        </Drawer>
                    </Hidden>
                    <Hidden smDown implementation="css">
                        <Drawer
                            variant="permanent"
                            open
                            classes={{
                                paper: classes.drawerPaper,
                            }}
                        >
                            {drawer}
                        </Drawer>
                    </Hidden>
                    <main className={classes.content}>
                        <div className={classes.toolbar} />
                        {children}
                    </main>
                </div>
            </Fragment>
        );
    }
}

Layout.propTypes = {
    classes: PropTypes.object.isRequired,
    theme: PropTypes.object.isRequired,
};

export default withStyles(styles, { withTheme: true })(Layout);
One thing that’s notable about this code, is the {children} placeholder within the <main> tags. The children property comes from this.props and it’s going to contain whatever is passed in between the <Layout> tags when we us that component.
So, let’s use the Layout component. Modify src/App.js so that it imports and uses our new component as follows:
import React, { Component } from 'react';
import './App.css';
import Layout from './components/layout';

class App extends Component {
  render() {
    return (
      <div className="App">
        <Layout/>
      </div>
    );
  }
}

export default App;
Now, you should see the following result in your web browser.
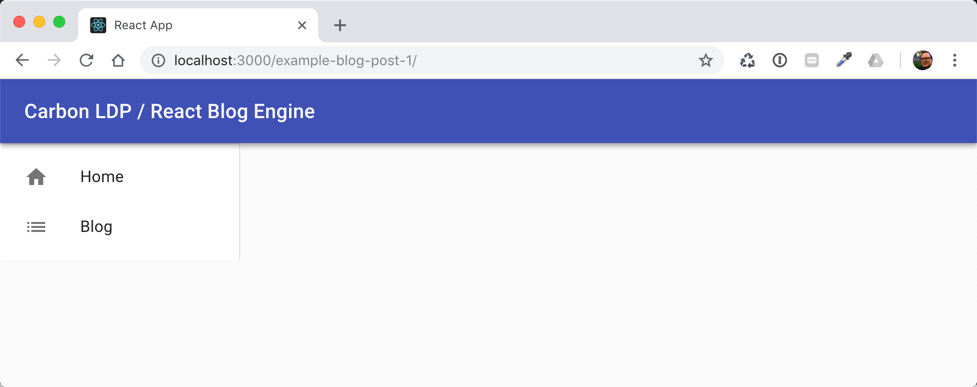
In keeping with our practice of committing at stable checkpoints, we’ll commit now with the following message:
Commit: Implement responsive drawer
Implement navigation routes
Now that we have a layout and a menu, we can implement some router navigation. However, before implementing navigation, we need some components that we can actually navigate to. For this, we’ll create three new simple components for the Home view and Blog view with simple output for an acid testing. Create the necessary directories and components as follows:
Create: src/components/blog/index.js
import React, { Component } from 'react';
class Blog extends Component {
  render() {
    return (
      <div className="Blog">
        <h1>Blog</h1>
      </div>
    );
  }
}

export default Blog;
Create: src/components/home/index.js
import React, { Component } from 'react';
class Home extends Component {
  render() {
    return (
      <div className="Home">
        <h1>Home</h1>
      </div>
    );
  }
}

export default Home;
Now execute the following command to install react-router-dom:
npm install --save react-router-domModify src/App.js as follows:
import React, { Component } from 'react';
import { BrowserRouter, Switch, Route } from 'react-router-dom'
import Home from './components/home';
import Blog from './components/blog';
import Layout from './components/layout';
import './App.css';

class App extends Component {
  render() {
    return (
      <BrowserRouter>
        <Layout>
          <Switch>
            <Route exact path='/' component={Home} />
            <Route exact path='/blog' component={Blog}/>
          </Switch>
        </Layout>
      </BrowserRouter>
    );
  }
}

export default App;
At this point, when you run the app with npm start, you will land on Home by default since that’s now tied to the path /. You can also manually enter the path /blog in your browser address bar to see that the router is working.
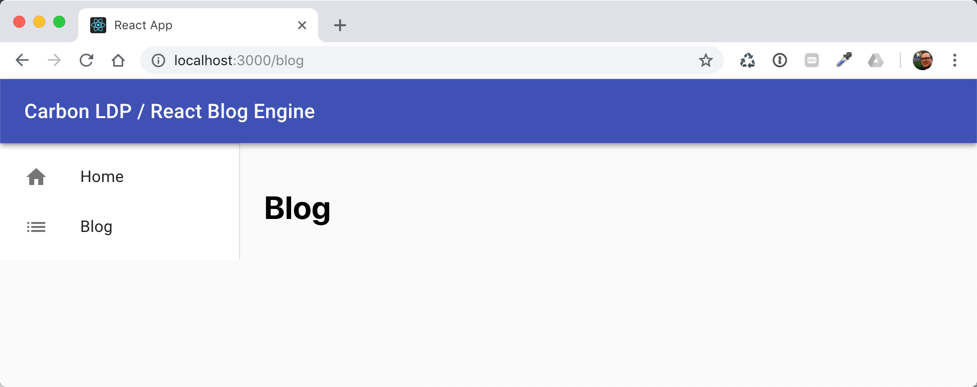
In keeping with our practice of committing at stable checkpoints, we can commit here with the following message:
Commit: Implement navigation routes
Link the menu items
Next, we need to add links to the menu items so that we can navigate by clicking them.
We’ll use the <NavLink> tag, which is a special version of the <Link> that can add styling attributes to the rendered element when it matches the current URL.
In src/layout/index.js, we need to import the Link component as follows:
import { NavLink } from 'react-router-dom';Also, in src/components/layout/index.js we can change the drawer constant to be as follows:
const drawer = (
    <div>
        <Hidden smDown>
            <div className={classes.toolbar} />
        </Hidden>
        <Divider />
        <List component="nav">
            <ListItem component={NavLink} to="/" button>
                <ListItemIcon>
                    <HomeIcon />
                </ListItemIcon>
                <ListItemText primary="Home" />
            </ListItem>
            <ListItem component={NavLink} to="/blog" button>
                <ListItemIcon>
                    <ListIcon />
                </ListItemIcon>
                <ListItemText primary="Blog" />
            </ListItem>
        </List>
    </div>
);
Now, our menu items are actually navigable. When you click on the menu items on the left, the associated views are loaded at right.
Committing at stable checkpoints, we’ll commit with the following message:
Commit: Link menu items
Create the New Post form view
Now we’ll implement a new view that allows us to create new blog posts, which will be persisted to Carbon LDP.
Create the following component: src/components/editor/index.js with the following contents (for now):
import React, {Component} from 'react'
import {withStyles} from '@material-ui/core/styles'
import {Button, TextField} from '@material-ui/core'

const styles = theme => ({
    FormControl: {
        width: 500
    },
    xsFormControl: {
        width: 100
    }
});

class Editor extends Component {

    state = {
        post: {
            $id: '',
            title: '',
            slug: '',
            excerpt: '',
            body: ''
        }
    };

    handleChange = name => ({target: {value}}) => {
        this.setState({
            post: {
                ...this.state.post,
                [name]: value
            }
        })
        if (name === 'title') {
            let friendlySlug = this.makeFriendlySlug(value)
            this.setState(() => ({
                post: {
                    title: value,
                    slug: friendlySlug
                }
            }))
        }
    }

    /**
     * Takes a given string and makes it URL friendly. It ignores nonalphanumeric characters,
     * replaces spaces with hyphens, and makes everything lower case.
     * @param {*} str
     */
    makeFriendlySlug(str) {
        // \W represents any nonalphanumeric character so that, for example, 'A&P Grocery' becomes 'a-p-grocery'
        let friendlySlug = str.replace(/\W+/g, '-').toLowerCase();
        // If the last char was nonalphanumeric, we could end with a hyphen, so trim that off, if so...
        if (friendlySlug.substring(friendlySlug.length - 1) === "-") {
            friendlySlug = friendlySlug.substring(0, friendlySlug.length - 1);
        }
        return friendlySlug;
    }

    handleSubmit = () => {
        // TO DO: validate form

        let blogPost = {...this.state.post};
        // save blogPost here...
    }

    render() {

        const {post: {$id, title, slug, excerpt, body}} = this.state,
            {classes} = this.props

        return (
            <div className="Editor">
                <h1>New Post</h1>
                <p>URL: {$id}</p>
                <form>
                    <TextField
                        label="Title"
                        value={title}
                        onChange={this.handleChange('title')}
                        margin="normal"
                        className={classes.FormControl}
                    />
                    <br/>
                    <TextField
                        label="Slug"
                        value={slug}
                        onChange={this.handleChange('slug')}
                        margin="normal"
                        className={classes.FormControl}
                    />
                    <br/>
                    <TextField
                        label="Excerpt"
                        multiline
                        rowsMax="5"
                        value={excerpt}
                        onChange={this.handleChange('excerpt')}
                        margin="normal"
                        className={classes.FormControl}
                    />
                    <br/>
                    <TextField
                        label="Body"
                        multiline
                        rowsMax="10"
                        value={body}
                        onChange={this.handleChange('body')}
                        margin="normal"
                        className={classes.FormControl}
                    />
                    <br/>
                    <Button
                        variant="contained"
                        color="primary"
                        className={classes.button}
                        onClick={this.handleSubmit}>Submit</Button>
                </form>
            </div>
        );
    }
}

export default withStyles(styles)(Editor);
It’s a lot of code, I know. For now, all you need to know is that this creates a basic form for creating new blog posts.
Now, let’s add a route and menu item for this new view.
Add a route for the New Post form view
In src/App.js, import the Editor component with:
import Editor from './components/editor';Then add the following route before the closing </Switch> tag:
<Route path='/blog/posts/new' component={Editor}/>You can verify this route works by manually entering the address in your browser URL address bar (http://localhost:3000/blog/posts/new).
Add a menu item for the New Post form view
We’ll create a New Post link in the menu now. In src/layout/index.js, add the following import for the menu item icon:
import CreateIcon from '@material-ui/icons/Create';Now update const drawer in the same file. Add the following after the closing </List> and just before the closing </div> defined within const drawer.
<Divider/>
<ListItem component={NavLink} to="/blog/posts/new" button>
    <ListItemIcon>
        <CreateIcon />
    </ListItemIcon>
    <ListItemText primary="New Post" />
</ListItem>
Now, we have a new menu item that links to our editor component.
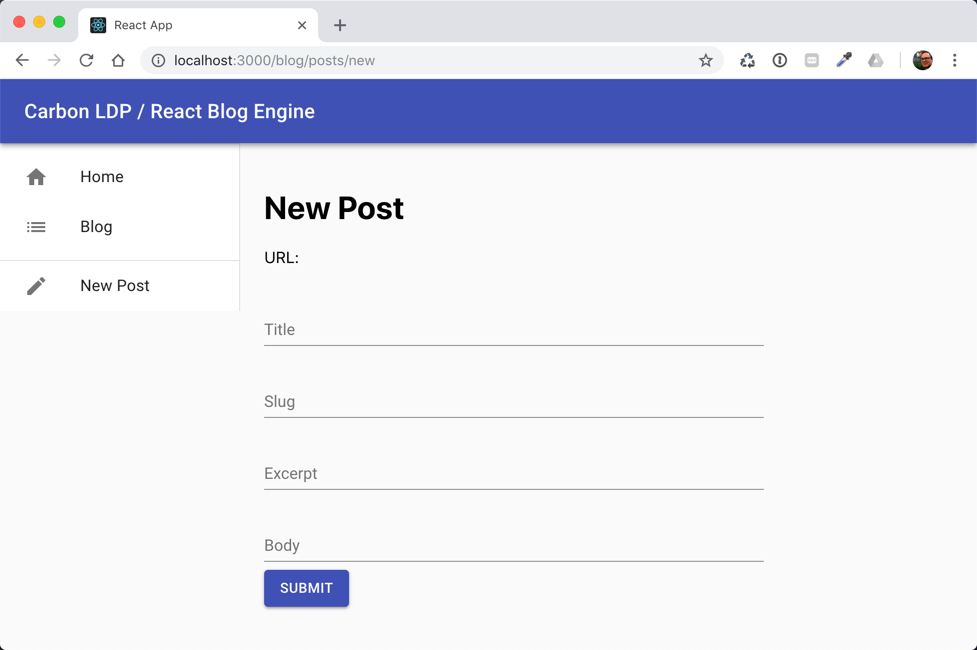
Commit: Add New Post menu item and view
Wrap up
In this tutorial series we are demonstrating how you can build a simple blog engine with Carbon LDP and React. Today, we focused only on the front-end and completed the following tasks. We:
-
– Reviewed the end goal (requirements and features)
– Created the project skeleton using Create React App
– Installed Material UI
– Implemented responsive drawer (a responsive fly-out menu)
– Implemented navigation routes
– Linked the menu items
– Created the New Post form view, it’s route, and menu item
We now have a front-end that is very basic, but functionally interactive. In Part 2, we’ll bring in the Carbon LDP JavaScript SDK so that we can use Carbon as a back-end for persisting application data.
